
MediaPipe 圖片嵌入器工作可將圖片資料轉換為數值表示法,以便完成機器學習相關的圖片處理工作,例如比較兩張圖片的相似程度。本操作說明說明如何使用圖片嵌入工具與 Python。
如要進一步瞭解這項工作的功能、模型和設定選項,請參閱總覽。
程式碼範例
圖片嵌入器的程式碼範例會提供 Python 中此工作的完整實作內容供您參考。這個程式碼可協助您測試這項工作,並開始建構自己的圖片嵌入器。您只需使用 Google Colab 的網路瀏覽器,即可查看、執行及編輯圖片嵌入工具的範例程式碼。您可以在 GitHub 上查看這個範例的原始碼。
設定
本節將說明如何設定開發環境和程式碼專案,以便使用 Image Embedder。如要進一步瞭解如何設定開發環境以使用 MediaPipe 工作,包括平台版本需求,請參閱 Python 設定指南。
套件
圖片嵌入器工作會使用 mediapipe pip 套件。您可以透過下列方式安裝依附元件:
$ python -m pip install mediapipe
匯入
匯入下列類別,存取 Image Embedder 工作函式:
import mediapipe as mp
from mediapipe.tasks import python
from mediapipe.tasks.python import vision
型號
MediaPipe 圖片嵌入器工作需要訓練的模型與此工作相容。如要進一步瞭解可供 Image Embedder 使用的訓練模型,請參閱工作總覽的「模型」一節。
選取並下載模型,然後將模型儲存在本機目錄中。您可以使用建議的 MobileNetV3 模型。
model_path = '/absolute/path/to/mobilenet_v3_small_075_224_embedder.tflite'
在 model_asset_path 參數中指定模型路徑,如下所示:
base_options = BaseOptions(model_asset_path=model_path)
建立工作
您可以使用 create_from_options 函式建立工作。create_from_options 函式會接受設定選項,以便設定嵌入選項。如要進一步瞭解設定選項,請參閱「設定總覽」。
圖片嵌入器工作支援 3 種輸入資料類型:靜態圖片、影片檔案和即時影片串流。請選擇對應於輸入資料類型的分頁,瞭解如何建立工作並執行推論。
圖片
import mediapipe as mp

BaseOptions = mp.tasks.BaseOptions
ImageEmbedder = mp.tasks.vision.ImageEmbedder
ImageEmbedderOptions = mp.tasks.vision.ImageEmbedderOptions
VisionRunningMode = mp.tasks.vision.RunningMode

options = ImageEmbedderOptions(
    base_options=BaseOptions(model_asset_path='/path/to/model.tflite'),
    quantize=True,
    running_mode=VisionRunningMode.IMAGE)

with ImageEmbedder.create_from_options(options) as embedder:
  # The embedder is initialized. Use it here.
  # ...
影片
import mediapipe as mp

BaseOptions = mp.tasks.BaseOptions
ImageEmbedder = mp.tasks.vision.ImageEmbedder
ImageEmbedderOptions = mp.tasks.vision.ImageEmbedderOptions
VisionRunningMode = mp.tasks.vision.RunningMode

options = ImageEmbedderOptions(
    base_options=BaseOptions(model_asset_path='/path/to/model.tflite'),
    quantize=True,
    running_mode=VisionRunningMode.VIDEO)

with ImageEmbedder.create_from_options(options) as embedder:
  # The embedder is initialized. Use it here.
  # ...
直播
import mediapipe as mp

BaseOptions = mp.tasks.BaseOptions
ImageEmbedderResult = mp.tasks.vision.ImageEmbedder.ImageEmbedderResult
ImageEmbedder = mp.tasks.vision.ImageEmbedder
ImageEmbedderOptions = mp.tasks.vision.ImageEmbedderOptions
VisionRunningMode = mp.tasks.vision.RunningMode

def print_result(result: ImageEmbedderResult, output_image: mp.Image, timestamp_ms: int):
    print('ImageEmbedderResult result: {}'.format(result))

options = ImageEmbedderOptions(
    base_options=BaseOptions(model_asset_path='/path/to/model.tflite'),
    running_mode=VisionRunningMode.LIVE_STREAM,
    quantize=True,
    result_callback=print_result)

with ImageEmbedder.create_from_options(options) as embedder:
  # The embedder is initialized. Use it here.
  # ...
設定選項
此工作包含下列 Python 應用程式的設定選項:
| 選項名稱 | 說明 | 值範圍 | 預設值 |
|---|---|---|---|
running_mode |
設定工作執行模式。共有三種模式: IMAGE:單一圖片輸入模式。 VIDEO:影片解碼影格模式。 LIVE_STREAM:輸入資料 (例如來自攝影機的資料) 的直播模式。在這個模式中,必須呼叫 resultListener,才能設定事件監聽器,以非同步方式接收結果。 |
{IMAGE, VIDEO, LIVE_STREAM} |
IMAGE |
l2_normalize |
是否要使用 L2 正規化,將傳回的特徵向量正規化。只有在模型未包含原生 L2_NORMALIZATION TFLite 運算時,才使用這個選項。在大多數情況下,模型都已包含這個運算,因此可透過 TFLite 推論達成 L2 規格化,而不需要使用這個選項。 | Boolean |
False |
quantize |
是否應透過純量量化,將傳回的嵌入值量化為位元組。系統會隱含假設嵌入項目為單位規範,因此任何維度都保證會具有 [-1.0, 1.0] 的值。如果不是這種情況,請使用 l2_normalize 選項。 | Boolean |
False |
result_callback |
在圖片嵌入工具處於即時串流模式時,將結果事件監聽器設為以非同步方式接收嵌入結果。只有在執行模式設為 LIVE_STREAM 時,才能使用 |
不適用 | 未設定 |
準備資料
將輸入內容設為圖片檔案或 Numpy 陣列,然後轉換為 mediapipe.Image 物件。如果輸入內容是網路攝影機的影片檔案或直播內容,您可以使用 OpenCV 等外部程式庫,將輸入影格載入為 NumPy 陣列。
圖片
import mediapipe as mp

# Load the input image from an image file.
mp_image = mp.Image.create_from_file('/path/to/image')

# Load the input image from a numpy array.
mp_image = mp.Image(image_format=mp.ImageFormat.SRGB, data=numpy_image)
影片
import mediapipe as mp

# Use OpenCV’s VideoCapture to load the input video.

# Load the frame rate of the video using OpenCV’s CV_CAP_PROP_FPS
# You’ll need it to calculate the timestamp for each frame.

# Loop through each frame in the video using VideoCapture#read()

# Convert the frame received from OpenCV to a MediaPipe’s Image object.
mp_image = mp.Image(image_format=mp.ImageFormat.SRGB, data=numpy_frame_from_opencv)
直播
import mediapipe as mp

# Use OpenCV’s VideoCapture to start capturing from the webcam.

# Create a loop to read the latest frame from the camera using VideoCapture#read()

# Convert the frame received from OpenCV to a MediaPipe’s Image object.
mp_image = mp.Image(image_format=mp.ImageFormat.SRGB, data=numpy_frame_from_opencv)
執行工作
您可以呼叫對應於執行模式的嵌入函式,以觸發推論。Image Embedder API 會傳回輸入圖片或影格片段的嵌入向量。
圖片
# Perform image embedding on the provided single image.
embedding_result = embedder.embed(mp_image)
影片
# Calculate the timestamp of the current frame
frame_timestamp_ms = 1000 * frame_index / video_file_fps

# Perform image embedding on the video frame.
embedding_result = embedder.embed_for_video(mp_image, frame_timestamp_ms)
直播
# Send the latest frame to perform image embedding.
# Results are sent to the `result_callback` provided in the `ImageEmbedderOptions`.
embedder.embed_async(mp_image, frame_timestamp_ms)
注意事項:
- 在影片模式或直播模式中執行時,您也必須為圖片嵌入器工作提供輸入影格時間戳記。
- 在圖片或影片模型中執行時,圖片嵌入器工作會阻斷目前執行緒,直到處理完輸入圖片或影格為止。
- 在直播模式下執行時,圖片嵌入器工作不會阻斷目前的執行緒,而是立即傳回。每次處理完輸入影格時,它都會使用嵌入結果叫用結果監聽器。如果在圖片嵌入器工作忙於處理其他影格時呼叫
embedAsync函式,工作會忽略新的輸入影格。
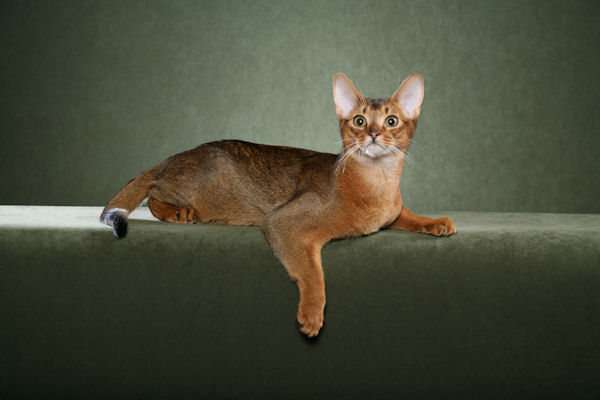
處理及顯示結果
執行推論時,「圖片嵌入器」工作會傳回 ImageEmbedderResult 物件,其中包含輸入圖片或影格內物件的可能類別清單。
以下是這項工作的輸出資料範例:
ImageEmbedderResult:
  Embedding #0 (sole embedding head):
    float_embedding: {0.0, 0.0, ..., 0.0, 1.0, 0.0, 0.0, 2.0}
    head_index: 0
我們是透過嵌入下列圖片取得這項結果:
您可以使用 ImageEmbedder.cosine_similarity 函式比較兩個嵌入項目的相似程度。請參閱以下程式碼範例。
# Compute cosine similarity.
similarity = ImageEmbedder.cosine_similarity(
  embedding_result.embeddings[0],
  other_embedding_result.embeddings[0])